Get Ready for Fall with the Bridgeport Jacket!

When I saw the sneak pics of the new jacket Amy over at Peek A Boo Pattern Shop was working on, I fell in love. As soon as the testing call went up in the Peek A Boo Pattern Group, I jumped right in and signed up. And the best part…I got selected! I couldn’t resist sewing more than one version up during testing. Once again, Amy has knocked it out of the park with a great pattern filled with a variety of options.
The Bridgeport Jacket can be made from knit or woven, making this a versatile pattern! There are directions for both knit and woven cuffs included. The outer can be made with the “v” shape or cut in a raglan style like the lining for two different looks. In addition if you used a reversible zipper, this jacket could be completely reversible! Now to check out the different versions I made:
The first two jacketsI made were using a knit print from Joanns and a quilting cotton upper. They also were lined with quilting cotton and had knit cuffs. These were a size 7 and a size 4T.

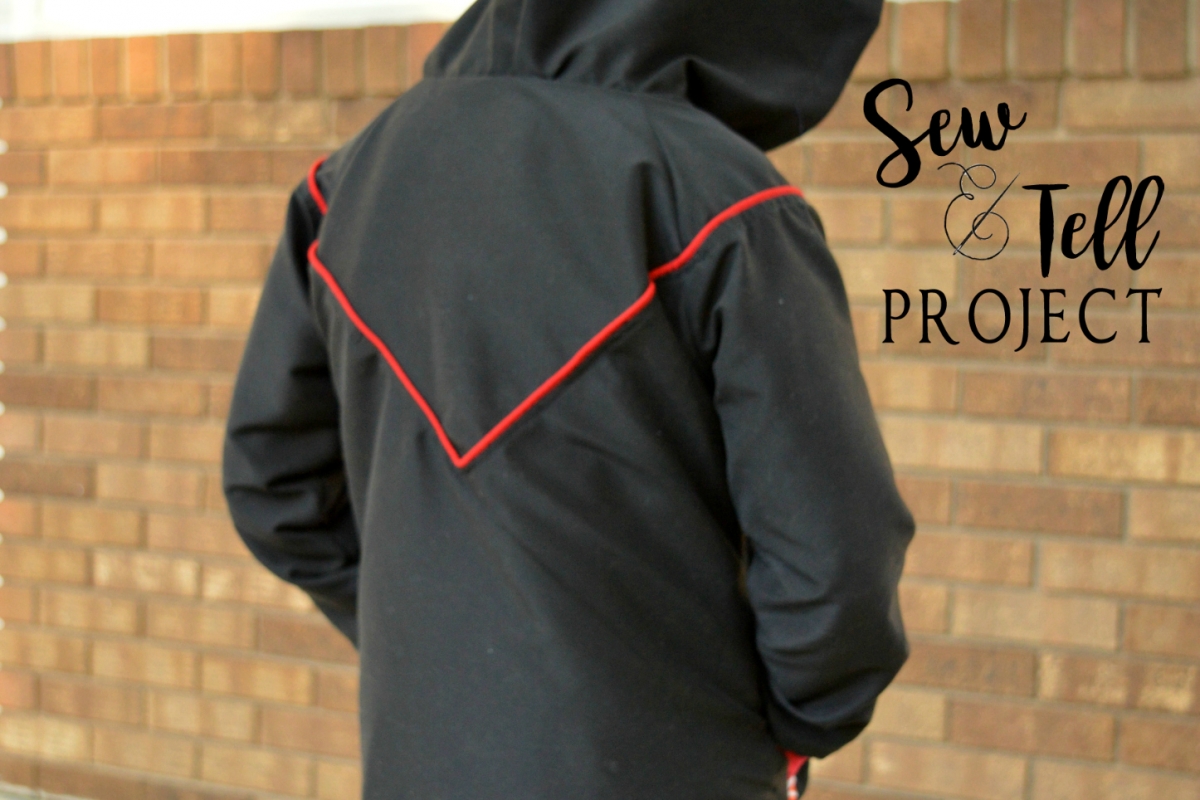
The trickiest part of the jacket is sewing the v on the back. I learned that it is definitely important to stay stitch the v if you are using knit. Otherwise it could stretch out and make sewing the v without puckers much harder!

I love the attention to detail in this jacket. The welt pockets are so gorgeous and so much easier than I thought! I have been so intimidated by welt pockets so I have been avoiding them. No more! I want to add them to everything I sew now including the Rough ‘N Tumble pants from PAB that my boys love.

The final coat I made was from black board short material from Peek A Boo. It makes a perfect fit for a fall or spring jacket because a light rain will bead up off it. My third son was starting kindergarten last week and was very nervous about it. I knew a perfect gift for him would be something mom-made. He is in LOVE with Paw Patrol. I had the perfect Paw Patrol lining fabric in my stash so I used that to line his size 6 coat. He was too excited to wear his coat that I didn’t get a chance to take a picture of the lining! I also had PAB’s red cotton lycra on hand so I used it for the cuffs and also for the lining of the sleeves.

I wanted to add a fun touch to the outside of my coat so I used red piping on the seam between the upper and lower sections of the outer. The tutorial for the jacket explains how to use piping so don’t worry that you have to figure it out on your own! I love the detail the piping adds to a solid coat. The hood has been modified a bit from this version to add a bit more front to back depth and round the back more. I can’t wait to sew that version up for my oldest who is begging for his own coat now!

When you’re making your Bridgeport Jacket, it may be necessary for you to learn how to shorten a separating zipper. At my local fabric store, they only sold zippers in even lengths. I ended up with 3 zippers that were too long in order to find the right colors! It took a bit of trial and error (and searching for the right tools in our hardware drawer) to shorten them correctly, but don’t worry! My sewing buddy Kasey (who also tested the windbreaker for her daughter) has written a post explaining in detail how to shorten a zipper! Head over to Ruby Rue Creations to see her tips and tricks!

My boys are loving their Bridgeport Jackets, and I can’t wait to see what you make too! Head on over to the Peek A Boo Pattern Shop Facebook page to get more inspiration and while you’re on Facebook (because really who only looks at one page while you’re there? 🙂 ) check out the Sew and Tell Project and give us a like!
Related
Related Posts
Ramona Quilt Featuring Lady Bird Fabrics!
Hello quilting friends!
I’ve slowly been trying to get back into the swing…
Related
Blessed Carlo Acutis Book Review
Hello, friends! I know it’s been a bit since I’ve shown…
Related
1 COMMENT
Leave A Comment
This site uses Akismet to reduce spam. Learn how your comment data is processed.


Felicia | 2nd Sep 16
I wasn’t going to buy any patterns in September… I didn’t last even a day!!