this is a page for
Category: freebies
Hello fabric friends!
I am thrilled to be included in another one of Sharon Holland’s fabulous blog tours. I promise you that you are in for a textile treat if you stop and visit the other makers. I love the fabulous banner tutorial Dritz shared with us last Friday, and I’m happy to be the first maker on the tour this week.
Make sure you visit Sharon Holland on Instagram as she is hosting very cool weekly giveaways featuring the tour’s sponsors: Dritz Sewing, BlocLoc Rulers, and Fat Quarter Shop. She is also hosting a similar giveaway on the weekly recap blog post. Continue Reading
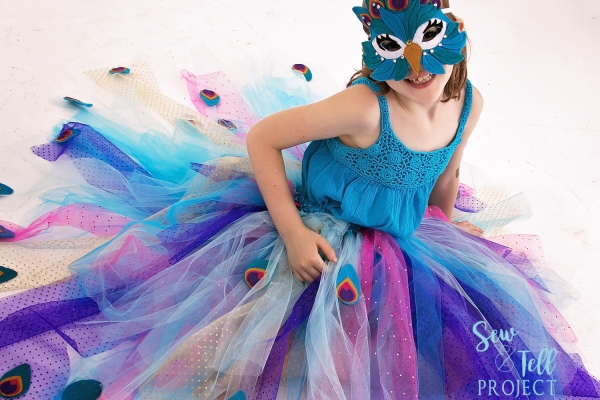
My version is sewn (using double sided, heat sensitive interfacing to hold the layers together, and then top stitching for detail and permanence), but you could easily throw this together with a hot glue gun.
Another great feature is that it’s super inexpensive to make–I spent less than $20 on felt, tulle, interfacing, and the pre-made waistband. I added the rhinestones from craft supplies I had at home because sparkle is necessary for this little girl. I also have a set of Felt Wings cut out to match. I can’t wait to see them together! Don’t worry…I’ll share. 😉
I added an extra layer of tulle. It’s not a full layer, like the first two, just adding pieces here and there to fill in spots or add a pop of color. I used a wide selection of tulle–matte, shiny, sequined, and glittered. I love the effect all the colors and textures make together!
The mask includes sizes 2-10, and the tutu instructions will fit newborn to 12. The tutorial includes instructions to customize to any size, however…even to adult!
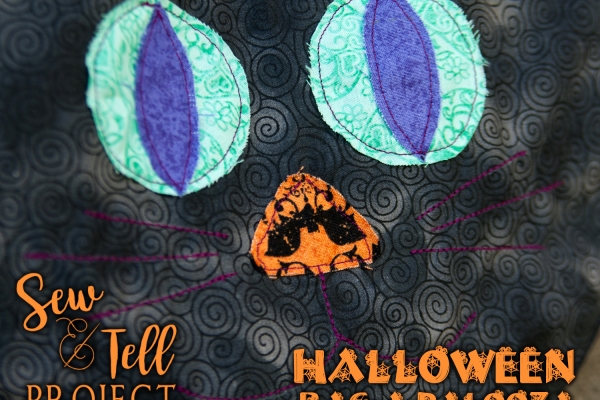
Halloween is just around the corner, and I’ve got a Kitty Cat Treat Bag for you today, with a super easy tutorial to make your own!
This bag can be made by a beginner, although it does involve sewing a strap and several curves. Don’t worry, you can do it! You’ll need about half a yard of your base fabric; that will be enough to cut your bag pieces, lining, and strap. You’ll also need some scraps to make the appliques for the front. I’ve made a spooky Halloween cat, but this shape easily lends itself to a Jack-o-Lantern or pumpkin, too! While you can just pin the applique pieces down, I highly recommend using some sort of double stick interfacing or tape to hold the pieces in place while you stitch. In addition, you’ll need pins, a sewing machine, thread (I used a contrasting color), about a half yard of lightweight interfacing, tailor’s chalk or a washaway marking pen, a flexible measureing tape, and two round templates (one with a diameter of 12-ish inches, and the other about 8 inches).
The first step will be cutting out your pieces. You’ll need 4 circles using your larger template (I used a serving plate for the larger template, and a salad plate for the smaller. Don’t tell my mom I used my china to cut fabric!). Use the smaller template to cut the top curve of the bag. I’m a big fan of “eyeballing it,” but the bottom of my curve is approximately 8 1/2 inches from the bottom of the bag. You’ll also need to cut 3 long strips. To determine the length of the two gusset strips, use a measuring tape to curve around the outside of your bag, from point to point. The width should be 3 inches. The handle for my bag was 17 x 3 inches. You’ll then need to cut interfacing in the exact same dimensions (I interfaced both the bag and lining with lightweight interfacing, but you could just interface the lining if you use a heavier interfacing). Finally, you’ll need to cut your scraps into the accent pieces: for my kitty, I cut 2 circles (diameter 2 inches each) with a pointy oval shape for the pupils. I cut a rounded triangle for the nose, and used the main bag piece as a guide to cut the ears with a slight curve (straight triangles would work just fine). For a pumpkin, you could just stitch curved lines on the main piece, and applique a leaf or curly stem, and a Jack-o-Lantern has so many fun face possibilities! I used a 3/8″ seam allowance for this project, but you can adjust that to whatever you’re comfortable with.
Fuse interfacing to wrong side of all four bag pieces, both gusset pieces, and the strap.
Place your applique pieces and either fuse or pin securely. Use your tailor’s chalk or marking pen to indicate where you want to stitch accents (here, a mouth and whiskers).
Carefully, top stitch all of your applique pieces down, and any accent stitching, too. I used the triple stitch meant for knits to do my accent lines to make it thicker.
I wanted to add a gusset to the bag to give it a little depth (the kiddos need room for TREATS, amiright?, but I wanted to taper it toward the top so I wouldn’t need to add a top piece and/or closure. I measured about a quarter down the length of the piece, folded it in half wrong sides together, and then marked a curve with the point at the very top of the fold, tapering down to the raw edge a quarter way down the piece. I marked it with chalk, and then cut the piece off.
Next, pin the gusset piece to one of the curved bag pieces, right sides together. I started in the middle and worked my way to the top. Stitch. Carefully add a second bag piece to the gusset, again pinning from the middle to the top, right sides together, and stitching. Repeat with the lining pieces.
Please forgive my stained ironing board cover; my cheap ironing board has rusted underneath and I can’t get the stains out. I’ve asked my husband for a new ironing board for Christmas. He thinks that’s a funny gift. 😉
Next, we’ll make the strap. Fold the strap in half lengthwise, press. Unfold, and press 1/2″ wrong sides together on each short end. Unfold, and then press 1/2″ along each long side. Unfold, and then fold in the pressed edge of the short ends. Fold the sides in over, and then fold in half. Be sure to tuck all raw edges in. Top stitch the strap about 1/8″ from the edge. I like this method because I despise turning tubes of fabric right side out, but you could fold the strap lengthwise, stitch the seam allowance along the two short sides and the long side, leaving an opening to turn the strap right side out. Be sure to top stitch for stability and also to close the opening.
You’ll end up with two bags (one main, one lining) and a strap. I have an extra because I changed my mind on part of the design. So…*waves hand* this is not the strap you’re looking for…
Sew your strap to the lining, right sides together. Make a couple of lines of stitching to be sure its held firmly in place.
Turn the main bag inside out, and place the lining inside it, so that the right sides of the fabric are together. Please note that you don’t see my strap here because I took these pictures before I remembered to attach the strap, but decided not to retake them. I hope it’s not too confusing! When you insert the lining into the bag, be sure that the strap isn’t in the way of the top, where you’ll be stitching. Carefully pin the lining to the bag, being careful to match up the gusset and to keep the strap out of the way. Sew the top curve, being sure to leave an opening to turn the bag right side out.
Reach in through your opening and pull the lining out first, and then turn the bag right side out. Push the lining down into the bag and press if necessary. Turn under the seam allowance of the opening you left to turn the bag, pin, and top stitch the entire top curve. Voila!
Finally, fill that bad boy up with treats!
I hope you’ve enjoyed my Kitty Cat Treat Bag, and also that you’ll share yours if you choose to create one! Be sure to check out the 9 other treat bag tutorials on the Halloween Bag-a-Palooza Tour.
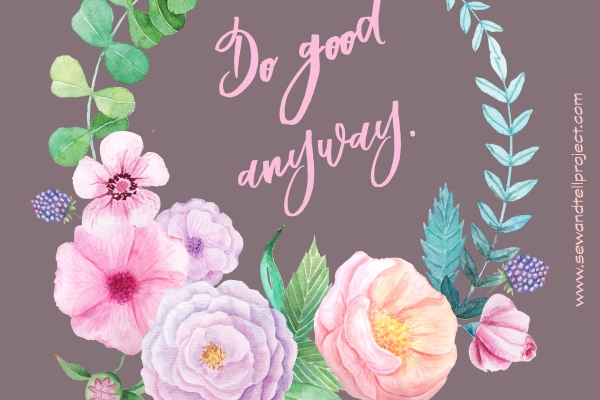
Today we are sharing two graphics honoring Mother Teresa who will be canonized a saint in the Roman Catholic Church on Sunday, September 4th.
Mother Teresa was known for her fondness for The Paradoxical Commandments by Dr. Kent M. Keith. She kept a copy hanging on the wall of her children’s home in Calcutta. Her tireless attitude to “Do Good Anyway” inspires the first graphic we are sharing with you. You may download it for your personal use here.
We are also sharing a special Mother Teresa quote formatted to be a lock screen for an iPhone or iPad. We have designed these to share with you for your personal use. The iPhone version is here and the iPad version is here.
The story behind this particular Mother Teresa quote occurred the night she received the Nobel Peace Prize. She was asked what we should do to promote peace in the world and she responded with, “Go home and love your family.” When I initially started working on this design project, I initially thought I would make the quote into an office poster. Even though I am a stay-at-home mom it is hard for me to “stop working.” This Mother Teresa quote is a gentle exhortation that our biggest duty is to simply love our families. I then decided I would make this a lockscreen wallpaper for my iPad to remind me to focus on that which is most important. I hope these graphics are useful and inspiring for you!
I had a lot of fun designing this today while my children were doing their schoolwork next to me! I hope to have a masculine lock screen to share with you soon. In the meantime, leave any feedback below as I am new to digital design.
I know I’ve been a bit quiet on the blog lately! I’ve been spending time with my friends at The Simple Life Pattern Company, traveling a lot, and getting ready to start our homeschool year. I’ve started to feel some withdrawal from not sewing as much as I’d like but I know that it is all for good reasons. I’m so grateful that Alisha, Genie, and Emily have been letting me craft vicariously through their amazing posts.
One of my goals right now is to get my life better organized. I have FOUR kids and I know a lot of women who are SUPER MOMS who never seem to miss a meeting, have dinner on the table every night, and go to sleep knowing that the necessary to-dos are done for the day. I also know there are moms like me still trying to find a system to keep it all together.
One of the priorities in my life is continuing to have time to CREATE and share my creations with you. Since I live 40 miles from where I run most of our family’s errands, I try to be as organized as possible since I almost always have all four of my kids with me when I’m running errands. I hate it when I get home and discover I’ve forgotten a key ingredient or worse a sewing notion that I can’t buy in town.
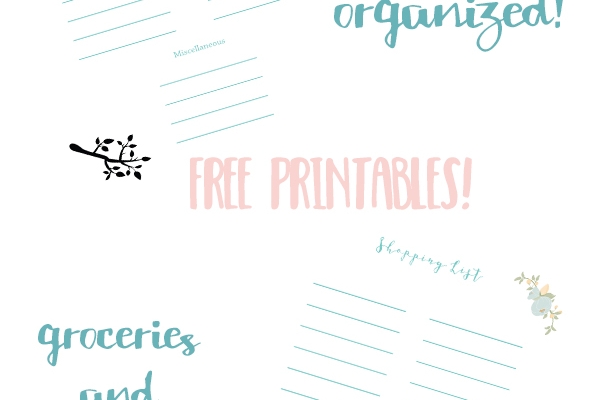
To help me stay organized and to help our readers, I’ve made two shopping printables for my Friday errands! One is a generic shopping list we have made available as a PDF download.
You can download this cute shopping list right here!
Are you a crafter like me and juggling kids, coupons, and time when you head to JoAnn’s, Hobby Lobby, or Michaels? Then this Project Shopping List is just for you!
You can download your Project Shopping List here! Add your yardage requirements, elastic, threads, hardware, etc., and never forget a notion again!
I’ll be using my list this weekend to get my supplies and hardware for the newly released Mic Drop Tote from Jodi at Sew Fearless!
What will you be shopping for this weekend?
