this is a page for
Category: Kids
Hello fabric friends!
I am thrilled to be included in another one of Sharon Holland’s fabulous blog tours. I promise you that you are in for a textile treat if you stop and visit the other makers. I love the fabulous banner tutorial Dritz shared with us last Friday, and I’m happy to be the first maker on the tour this week.
Make sure you visit Sharon Holland on Instagram as she is hosting very cool weekly giveaways featuring the tour’s sponsors: Dritz Sewing, BlocLoc Rulers, and Fat Quarter Shop. She is also hosting a similar giveaway on the weekly recap blog post. Continue Reading
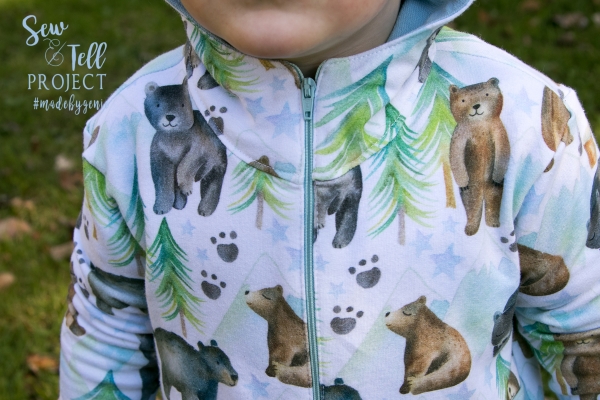
The Navigator Pullover is an on trend, half-zip pullover with a front kangaroo pocket, and options for a collar or hood in sizes 2T through 16. It’s designed for stable knits, and perfect for boys and girls. I chose a cotton lycra French Terry with 4 way stretch from Raspberry Creek Fabrics, but many of the testers used less stretchy ponte or fleece with great results.
As always, Love Notion’s finishing is spot on, making it easy for your projects to look professional. The tutorial includes links to videos for the tricky parts. Look at how nicely that collar and zipper line up!
Stay tuned, I’ve heard rumors that this will be coming soon in adult sizes! I can hardly wait! But…one more photo of the boy because he is so stinkin’ cute!
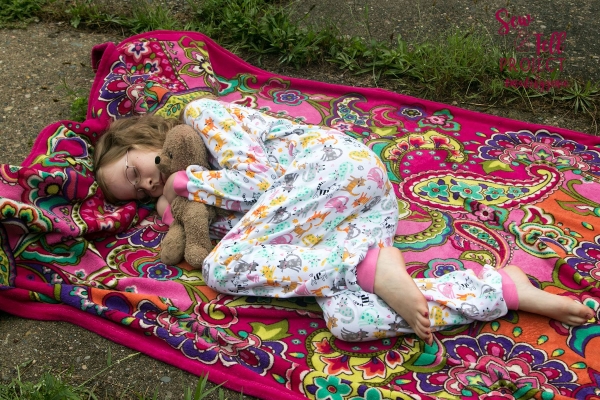
Here is Genie’s daughter in the cuffed pants and long sleeve options. These are cotton interlock with cotton lycra bands. Genie chose the half zip option as well. The zipper assembly on these pajamas is straightfoward and a video tutorial is linked in the instructions to help with any tricky spots you might find.
I (Alisha) made two versions of the Classic Zip Pajamas during testing. The cuffed shorts and short sleeves are a great option for summer. My son has hardly taken these off since I finished sewing them. I used interlock with cotton lycra bands like Genie did with the half zip option. The shorts were slimmed down slightly after I made this version.
My seven year old has been begging for fleece zip up jammies for months so he was so excited when I made him some. I appreciate that Amy includes the torso length measurement in this size chart for this pattern because I needed to size up for his pajamas. If using fleece, I recommend double checking that measurement since fleece has no vertical stretch. Just like my other son, he’s been wearing these a ton even though it is 90 degrees outside. I’ve decided that’s a battle I’m not willing to fight!
If you have previously purchased Amy’s zip up pajama pattern, you can simply redownload this version from your account. If you don’t have a zip up pj pattern, we recommend the Classic Zip Pajamas. They’re a fairly quick sew with a variety of options that work great year round.
The Hideout Hoodie is a relaxed fit raglan with short or long sleeves and a hood or neckband which allow you to make a variety of looks from one pattern. More bang for your buck!
First I whipped up a size 7 for my almost 8 year old with red cotton/lycra french terry from the Peek a Boo Fabric shop. I paired it with black cotton lycra and a Ninja digital design from PAB. Even though there’s a lot of details, this was a fast sew.
My son absolutely loves his new shirt, but my favorite is the angled side detail. I added red trim to the top of my pocket, and I absolutely love the pop that the gray and white yarn dyed stripes add to the angle detail.
The pockets are more of a mini size but my son found plenty of opportunities to stash things in them while practicing his ninja moves 🙂
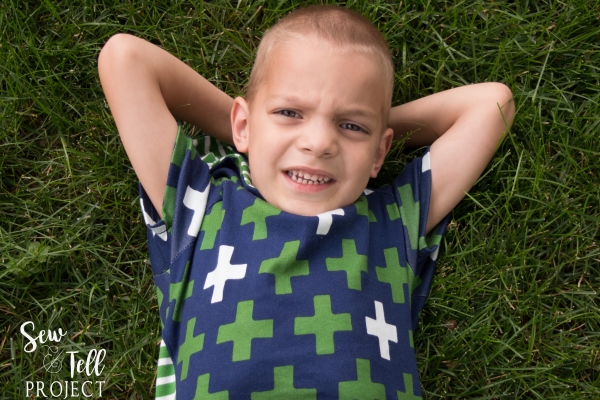
During testing, I made a size 6 hoodie for my 4 year old. It is too big for him right now, but I sized up in anticipation of it fitting next year as well. Cloud 9 Interlock is such wonderful quality and the stripes and crosses were the perfect for a super soft hoodie. It’s even on sale!
This hoodie pairs perfectly with his Rough ‘n Tumble pants which I’m pretty sure he stole from his brother’s drawer as they’re also too big! The hood is a crossover style, but has plenty of room!
Make sure to grab your copy of the Hideout Hoodie while it’s on sale through Thursday night! It’s perfect for both boys and girls. I have one cut out for my daughter that I’m looking forward to sewing soon!
We put together this special post today with some of our favorite patterns in case you decide to stock up during the Fourth of July Sale!
To take advantage of the sale visit Peek-a-Boo Pattern Shop and place your order! All sewing patterns are buy 4, get 1 free! No code necessary!
Need inspiration to fill your cart? Check out what the Sew and Tell Project team has made and loved!
Mariposa Dress and Top. Sewn by Alisha.
Swan Lake Leotard. Sewn by Eleri. (Make sure you also check out our tips and tricks for sewing with swim which features the Sun n Fun Leotard!) This one was made with swim supplies from the Peek-a-Boo Pattern Shop! 3. Rocky Mountain Raglan. Sewn by Genie and Eleri. Let’s not forget the MEN in our lives. Stock up on affordable knit solids and the Rocky Mountain Raglan pattern and whip up a pile for your favorite guy!
4. Bahama Mama Swim Wear PAB has a nice range of mama-friendly swimwear to keep you sporty and cool all summer long! See what Alisha and Eleri made below!
5. Sun Kissed Dolman and Little Miss Sunshine. Sewn by Eleri.
6. Bridgeport Jacket. Alisha made the black one using board short fabric from the shop!
7. The Lullaby Line Cardigan bodysuit. Check out Genie’s adorable cover model!
9. Marilyn Swimsuit. Made by Emily10. Dream Land Nightgown made by Emily. Keep it cool on hot summer nights in a breezy nightgown! 11. Lullaby Gown. Perfect for all the babies in your life! Made by Alisha. Check out the entire Lullaby Line for every baby’s need!
12.
Pocketful of Posies. Continue Reading
I decided to sew for two of my kids this year-my baby girl (who’s really more of a toddler) and my 9 year old. Sly Fox Fabrics was kind enough to send each of us bloggers some yardage to use during the tour. They’re a new-to-me company, but I was so impressed with the quality of their fabric and the speed of their shipping. Make sure to check out their Americana collection here for your own patriotic sewing.
First up, my 9 year old…I chose a baby French Terry in mottled denim from Sly Fox to make Coastal Craze Baggies from Peek a Boo Pattern Shop for his shorts. Somehow each of my boys are in dire need of shorts in their closets this year! I sized up one size so hopefully these will still fit next year.
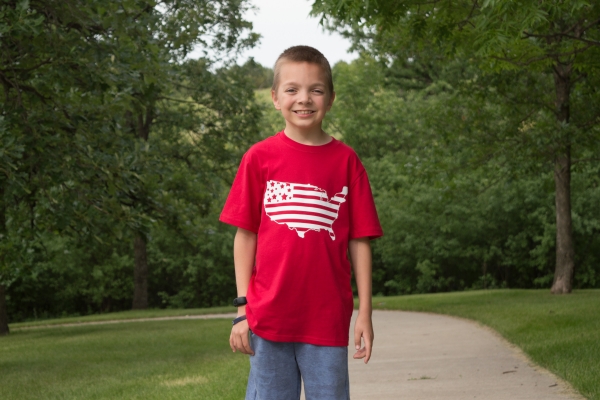
I used a navy cotton lycra from Peek A Boo Pattern Shop for the waistband, and as soon as he put these on, he told me they were the softest shorts I’ve ever made him. He’s already worn them several times which is always a good sign! For his tee, I used Katy’s Stars and Stripes design for HTV over at Thread and Grain and ironed it on a ready to wear t shirt.
For my daughter, this beautiful blue and white rayon challis stripe jumped out at me. I started out making a Baby Mia from Simple Life Pattern Company, but after I completed the skirt, I decided to alter my plans and mashed the top tier of the skirt with the Baby Bella woven bodice. I used a red Kona cotton from Joann’s for the accents.
My favorite part of this dress is the straps of the Bella in the back. I love using the v back and straight straps to add visual interest. I paired the tunic with the Tammy Tulip shorts I featured in my Baby Skyler post, but I used the inside of them since they’re reversible.
Thanks for stopping by my stop here for the Sew Americana tour. I’ll leave you with the best picture of the two of them I could get. Toddlers are hard to photograph! Make sure to check out the other stops on the tour as well. There are some beautiful makes!
Monday, June 25:
Wild + Wanderful | Marvelous Auntie M | Handmade Boy
Phat Quarters | Call Ajaire
Tuesday, June 26:
Musings of a Seamstress | Sea of Estrogen | Sew and Tell Project5 out of 4 Patterns |
Little Heart Threads Continue Reading
When a big box of knits arrives at my house (not very frequently if my husband is reading this), two of my daughters immediately start claiming fabrics and asking for dresses. To be honest, they have been a bit “mama-made” starved the past several months. I am nearly 30 weeks pregnant now and have taken a bit of a pregnancy and long winter-related hiatus from doing a lot of girls’ sewing, blogging, and shooting. The new Skyler dress pattern was perfect to get my “sewjo” back and also take advantage of utilizing some fabric cuts that I loved but had been sitting for several months. And if you haven’t seen the news on Instagram, I am having another girl, so I promise more girls’ sewing is coming!
I love sewing with knits, particularly high-quality cotton lycra/spandex. I made this version in one of my favorite Art Gallery Fabrics prints by Sharon Holland Designs.
I chose to do the large bow back view for this version and had just enough fabric for the circle skirt. This is a straight size 4.
One of the variations of Skyler’s top and dress includes small side bows. I made 3 sets of hairbows to coordinate with her favorite Skyler dresses as you can see in this picture. Just follow the tutorial to make the bows and hot glue to your favorite clip of choice. Due to the thickness of her hair, I used french barrettes so they would not slip out.
For my next Skyler, I combined one of my favorite fabrics, Art Gallery Yellow Stripes, with a large remnant I had leftover from sewing for the Printemps Fusions Lookbook earlier this spring. I just cut the fabric to length to the width of fold due to the limited yardage I had. Luckily, with knits you can get away with removing a few inches on gathered skirts. This pattern is also suitable for using woven fabric for the SKIRT ONLY but I prefer to make all-knit dresses for ease of washing and comfortable wear.
For this version, I chose the simple square back. The instructions were clear to make a fully-lined and unique bodice.
I also used my time during testing to get Little Miss’s 4th of July outfit created! Doesn’t she look like a little firecracker? I did another large center bow for her and used the circle skirt for maximum twirl! The fabric is a custom print I picked up last summer that is no longer available. I’m glad I saved it for the right pattern!
During testing this Little Miss also had a 4th birthday! I pulled every gorgeous floral and every whimsical print I had out of my stash to let her choose! She kept saying, “Nope. Not enough colors.” Until we arrived at this stripe which is still in stock here! Momfession: I tried one more time to get her to choose a tossed print so I could do the speedy circle skirt. But, seriously, even if you use all the options, my first Skyler took me less than 2 hours even with careful stripe matching and needing to follow the instructions step by step.
She wore this to her birthday party and got soooo many compliments!
Finally, I want to share my very favorite Skyler!
My nearly ten-year-old daughter helped me find these beautiful fabrics in my stash. I combined Art Gallery sleek mint stripes with another older AGF print from the Geometric Bliss collection. My daughter wanted a circle skirt and simple square back done on the modest cut line with short sleeves for summer events. The pattern also includes full-length sleeves so I know it will transition well for back to school. I sewed her a straight size 10 bodice and lengthened the skirt to a 12 due to her height.
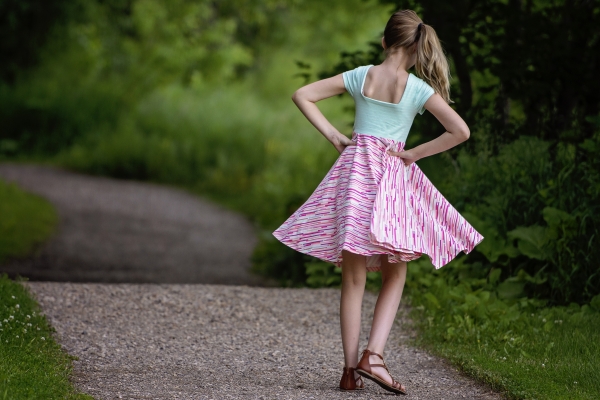
The dress had the tween-friendly, retro look we were both going for. I usually avoid cutting a circle skirt on directional fabric, but since these were vertical stripes in short bursts, I thought it would be fun to play with the print’s orientation within the circle skirt. It kind of looks like a colorful disco ball to me!
Last but not least, I have a bonus Skyler to share! 3 of us 4 over at Sew and Tell Project participated in testing the Skyler. We all loved it! Here is Emily’s beautiful version in a size 7/8L on her little girl. I love the colorful use of chevrons to showcase the pattern.
I hope one or two of these beautiful dresses has inspired you to add the Skyler’s Square Back Top and Dress to your pattern stash and more importantly, get sewing! Tell us what you think below!
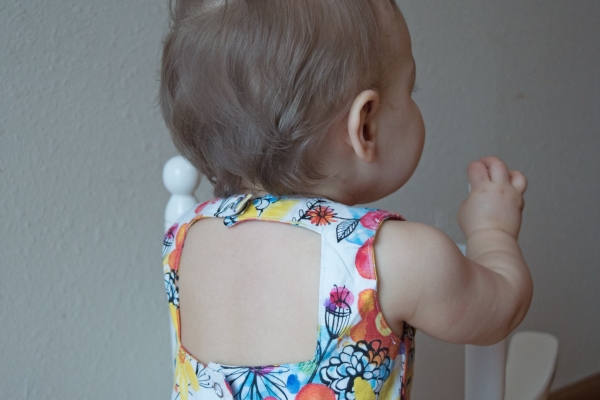
I made two versions of the Baby Skyler during testing. The first was the simple open back cut out and gathered peplum length top. This Riley Blake Idelwild knit is perfect for this summer tank.
I paired my Baby Skyler with a pair of Baby Tammy Tulip shorts. I love that they are reversible for two different looks and work great with this peplum length top.
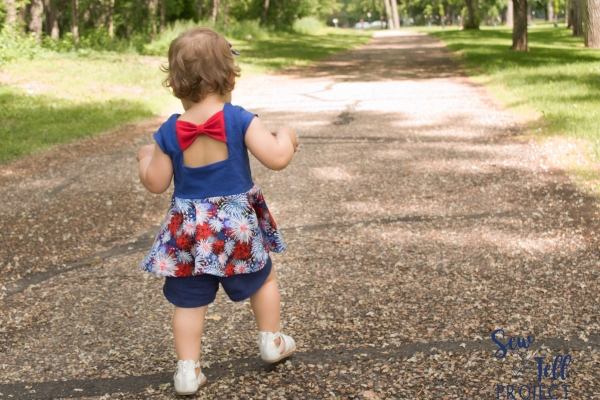
The Fourth of July is fast approaching, and for my second Baby Skyler, I decided to run with the red, white, and blue theme. I made the short sleeve circle skirt peplum length top with the big bow on the cutout. I used royal blue and red cotton lycra from Peek a Boo Pattern Shop, my favorite place to buy cotton lycra solids (and most other fabrics!), and a woven fireworks fabric I’ve had in my stash from Joanns since last year.
This top is perfect for those hot summer days and parades on the Fourth. The woven skirt still fit perfectly over my daughter’s head and tummy and makes for a great casual top for the parade we’ll be attending. The red bow on the back makes for a fun surprise when she turns around and runs away which is so common these days!
Thanks for checking out my versions of the Baby Skyler, and make sure to subscribe to our blog so you don’t miss Emily and Eleri’s versions of the Skyler for their big girls!
You can buy the baby Saylor here! And you can grab the girls’ Saylor here!
The Saylor is a versatile, sleeveless dress and top with several backview variations and optional cap sleeves. One of my favorite features is the accent bows for the dress with bonus hairbow tutorial.
Alisha and I both sewed the SAME back view! Don’t you love it when you share similar tastes with a friend? It makes helping each other choose fabric and patterns so much more fun!
I love how sweet Miss M looks with her beautiful square back and romper bottom outfit!
I think Miss M likes her outfit, too! Now, let me share what my own Miss M thinks of her Saylor dress!
My little miss has been on a serious growth spurt as we approach her 4th birthday! I made her a straight size 5, so even with the deep 2″ hem in the pattern instructions, her dress hits below the knees. I’m okay with this since it will mean it should fit most of the summer. But if she grows, Saylor is a very quick and enjoyable sew! I think many more of these will be in her closet this summer!
To make her look I used some of the gorgeous new Tallinn Fabrics collection by Jessica Swift! This gorgeous red print is Odessa Traditionale and it is one of my favorite prints from the collection. I actually just backed an entire quilt that I will share with you at the end of the month in the alternate colorway!
Once I made my first Saylor and realized how quick it was, I decided that my big girls needed their own Saylor dresses. I used one of my favorite prints from Maureen Cracknell’s Soulful collection. I realized last week when we had a fancy family dinner outing, that my big girls have grown A LOT over this winter. I made Miss E the size 10 and added 0.5″ to the bodice length and 2″ to the skirt. Saylor is designed to fall just above the knee, but with how quickly the girls are growing these days (and with snow still on the ground) I wanted to make sure this was long enough through the summer.
One of my favorite things about the Saylor is the classic silhouette. It is a wonderful beginner sew that has several details so you can make Saylor many times without making the same design twice! I can’t wait to share more Saylors with you through this summer.
With 144 combinations of necklines, sleeves, sash, and skirts, this truly can be the one and only dress you need.
I used a woven from Hobby Lobby for Miss M’s first dress. I chose the sweetheart neckline, classic back, puff sleeves, and classic with ruffle skirt. The puff sleeves add such a sweet touch, and I just love the extra ruffle.
For my second dress, I used a lovely floral and chose the sweetheart neckline, flutter sleeves, scoop back, and twirl skirt. The twirl skirt is a gathered circle skirt and has such fun “twirability” for the older girls.
I chose to add the sash but I altered the back because I just wanted it as a band instead of with ties. I used metal snaps on both my dresses instead of buttons.
Hemming circle skirts is one of the most challenging part of sewing dresses for me. When I read Becca’s tutorial over at Simple Life Pattern Company about hemming circle skirts with bias tape, I knew this was a technique I needed to use. I used a red storebought bias tape to hem my skirt, and the process was so fast and easy. Make sure to head over and check out her tutorial! Not only is it a faster way to hem, it adds a fun pop of color to the inside of your skirt.
Make sure to head over to Peekaboo Pattern Shop and grab your copy of the Wildflower Dress. It’s a perfect Easter sew, and with 144 combinations, your little girl’s closet can be full of Wildflowers that are as varied as a beautiful field of flowers.
