this is a page for
Category: Peekaboo Pattern Shop
Hello fabric friends!
I am thrilled to be included in another one of Sharon Holland’s fabulous blog tours. I promise you that you are in for a textile treat if you stop and visit the other makers. I love the fabulous banner tutorial Dritz shared with us last Friday, and I’m happy to be the first maker on the tour this week.
Make sure you visit Sharon Holland on Instagram as she is hosting very cool weekly giveaways featuring the tour’s sponsors: Dritz Sewing, BlocLoc Rulers, and Fat Quarter Shop. She is also hosting a similar giveaway on the weekly recap blog post. Continue Reading
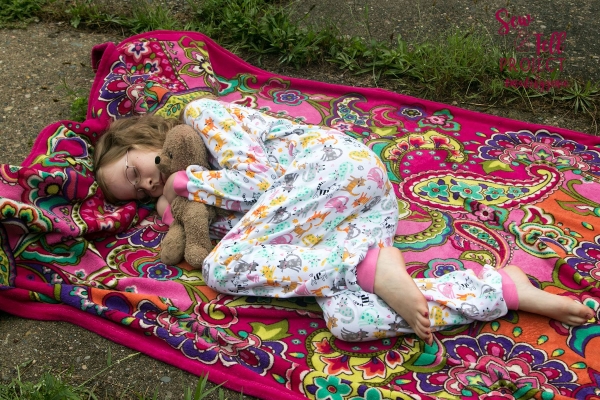
Here is Genie’s daughter in the cuffed pants and long sleeve options. These are cotton interlock with cotton lycra bands. Genie chose the half zip option as well. The zipper assembly on these pajamas is straightfoward and a video tutorial is linked in the instructions to help with any tricky spots you might find.
I (Alisha) made two versions of the Classic Zip Pajamas during testing. The cuffed shorts and short sleeves are a great option for summer. My son has hardly taken these off since I finished sewing them. I used interlock with cotton lycra bands like Genie did with the half zip option. The shorts were slimmed down slightly after I made this version.
My seven year old has been begging for fleece zip up jammies for months so he was so excited when I made him some. I appreciate that Amy includes the torso length measurement in this size chart for this pattern because I needed to size up for his pajamas. If using fleece, I recommend double checking that measurement since fleece has no vertical stretch. Just like my other son, he’s been wearing these a ton even though it is 90 degrees outside. I’ve decided that’s a battle I’m not willing to fight!
If you have previously purchased Amy’s zip up pajama pattern, you can simply redownload this version from your account. If you don’t have a zip up pj pattern, we recommend the Classic Zip Pajamas. They’re a fairly quick sew with a variety of options that work great year round.
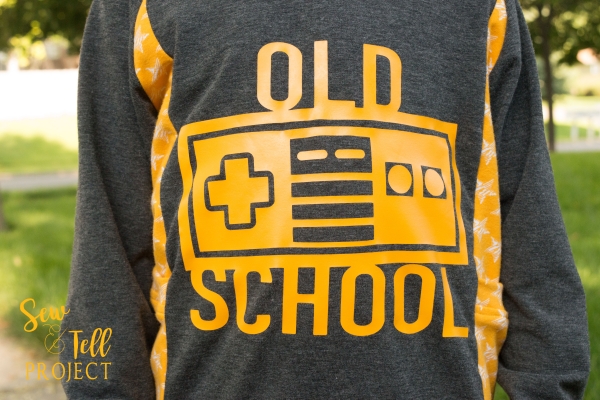
The Hideout Hoodie is a relaxed fit raglan with short or long sleeves and a hood or neckband which allow you to make a variety of looks from one pattern. More bang for your buck!
First I whipped up a size 7 for my almost 8 year old with red cotton/lycra french terry from the Peek a Boo Fabric shop. I paired it with black cotton lycra and a Ninja digital design from PAB. Even though there’s a lot of details, this was a fast sew.
My son absolutely loves his new shirt, but my favorite is the angled side detail. I added red trim to the top of my pocket, and I absolutely love the pop that the gray and white yarn dyed stripes add to the angle detail.
The pockets are more of a mini size but my son found plenty of opportunities to stash things in them while practicing his ninja moves 🙂
During testing, I made a size 6 hoodie for my 4 year old. It is too big for him right now, but I sized up in anticipation of it fitting next year as well. Cloud 9 Interlock is such wonderful quality and the stripes and crosses were the perfect for a super soft hoodie. It’s even on sale!
This hoodie pairs perfectly with his Rough ‘n Tumble pants which I’m pretty sure he stole from his brother’s drawer as they’re also too big! The hood is a crossover style, but has plenty of room!
Make sure to grab your copy of the Hideout Hoodie while it’s on sale through Thursday night! It’s perfect for both boys and girls. I have one cut out for my daughter that I’m looking forward to sewing soon!
We put together this special post today with some of our favorite patterns in case you decide to stock up during the Fourth of July Sale!
To take advantage of the sale visit Peek-a-Boo Pattern Shop and place your order! All sewing patterns are buy 4, get 1 free! No code necessary!
Need inspiration to fill your cart? Check out what the Sew and Tell Project team has made and loved!
Mariposa Dress and Top. Sewn by Alisha.
Swan Lake Leotard. Sewn by Eleri. (Make sure you also check out our tips and tricks for sewing with swim which features the Sun n Fun Leotard!) This one was made with swim supplies from the Peek-a-Boo Pattern Shop! 3. Rocky Mountain Raglan. Sewn by Genie and Eleri. Let’s not forget the MEN in our lives. Stock up on affordable knit solids and the Rocky Mountain Raglan pattern and whip up a pile for your favorite guy!
4. Bahama Mama Swim Wear PAB has a nice range of mama-friendly swimwear to keep you sporty and cool all summer long! See what Alisha and Eleri made below!
5. Sun Kissed Dolman and Little Miss Sunshine. Sewn by Eleri.
6. Bridgeport Jacket. Alisha made the black one using board short fabric from the shop!
7. The Lullaby Line Cardigan bodysuit. Check out Genie’s adorable cover model!
9. Marilyn Swimsuit. Made by Emily10. Dream Land Nightgown made by Emily. Keep it cool on hot summer nights in a breezy nightgown! 11. Lullaby Gown. Perfect for all the babies in your life! Made by Alisha. Check out the entire Lullaby Line for every baby’s need!
12.
Pocketful of Posies. Continue Reading
I decided to sew for two of my kids this year-my baby girl (who’s really more of a toddler) and my 9 year old. Sly Fox Fabrics was kind enough to send each of us bloggers some yardage to use during the tour. They’re a new-to-me company, but I was so impressed with the quality of their fabric and the speed of their shipping. Make sure to check out their Americana collection here for your own patriotic sewing.
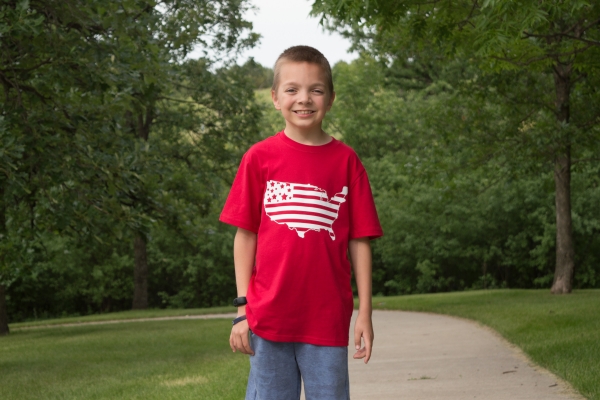
First up, my 9 year old…I chose a baby French Terry in mottled denim from Sly Fox to make Coastal Craze Baggies from Peek a Boo Pattern Shop for his shorts. Somehow each of my boys are in dire need of shorts in their closets this year! I sized up one size so hopefully these will still fit next year.
I used a navy cotton lycra from Peek A Boo Pattern Shop for the waistband, and as soon as he put these on, he told me they were the softest shorts I’ve ever made him. He’s already worn them several times which is always a good sign! For his tee, I used Katy’s Stars and Stripes design for HTV over at Thread and Grain and ironed it on a ready to wear t shirt.
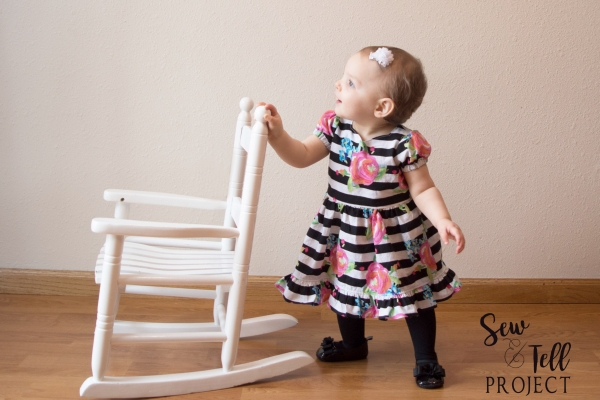
For my daughter, this beautiful blue and white rayon challis stripe jumped out at me. I started out making a Baby Mia from Simple Life Pattern Company, but after I completed the skirt, I decided to alter my plans and mashed the top tier of the skirt with the Baby Bella woven bodice. I used a red Kona cotton from Joann’s for the accents.
My favorite part of this dress is the straps of the Bella in the back. I love using the v back and straight straps to add visual interest. I paired the tunic with the Tammy Tulip shorts I featured in my Baby Skyler post, but I used the inside of them since they’re reversible.
Thanks for stopping by my stop here for the Sew Americana tour. I’ll leave you with the best picture of the two of them I could get. Toddlers are hard to photograph! Make sure to check out the other stops on the tour as well. There are some beautiful makes!
Monday, June 25:
Wild + Wanderful | Marvelous Auntie M | Handmade Boy
Phat Quarters | Call Ajaire
Tuesday, June 26:
Musings of a Seamstress | Sea of Estrogen | Sew and Tell Project5 out of 4 Patterns |
Little Heart Threads Continue Reading
With 144 combinations of necklines, sleeves, sash, and skirts, this truly can be the one and only dress you need.
I used a woven from Hobby Lobby for Miss M’s first dress. I chose the sweetheart neckline, classic back, puff sleeves, and classic with ruffle skirt. The puff sleeves add such a sweet touch, and I just love the extra ruffle.
For my second dress, I used a lovely floral and chose the sweetheart neckline, flutter sleeves, scoop back, and twirl skirt. The twirl skirt is a gathered circle skirt and has such fun “twirability” for the older girls.
I chose to add the sash but I altered the back because I just wanted it as a band instead of with ties. I used metal snaps on both my dresses instead of buttons.
Hemming circle skirts is one of the most challenging part of sewing dresses for me. When I read Becca’s tutorial over at Simple Life Pattern Company about hemming circle skirts with bias tape, I knew this was a technique I needed to use. I used a red storebought bias tape to hem my skirt, and the process was so fast and easy. Make sure to head over and check out her tutorial! Not only is it a faster way to hem, it adds a fun pop of color to the inside of your skirt.
Make sure to head over to Peekaboo Pattern Shop and grab your copy of the Wildflower Dress. It’s a perfect Easter sew, and with 144 combinations, your little girl’s closet can be full of Wildflowers that are as varied as a beautiful field of flowers.
Here’s what you need to know about the High Tide:
-Sizes 3 months through 12 years (snap crotch option for 3 months through 4T)
-Plain suit, ruffle suit, skirted suit, or top option
-Cap sleeves, short sleeves, or long sleeves.
I was nervous about trying to install a zipper in swim material, but with some Washaway Wonder Tape and a bit of patience, it was not nearly as difficult as I thought. Amy has also made a video to help with the zipper installation and the neckband. I can’t wait to make the High Tide as rash guard tops for my boys as the zippers will make it easier to get those wet rash guards off!
I used the Paradise Floral swim fabric from last year for Miss M’s suit, but there are so many other cute options available at Peek a Boo Pattern Shop that I’m already trying to decide on which to use for Miss M’s next suit!
The sweet little ruffle adds such a fun detail to the suit, and one of my favorite features of the suit is the zipper guard behind the zipper protecting the neck and chest from the zipper.
Make sure to hop on over to Peek a Boo Pattern Shop and grab your copy of the High Tide Surfsuit and the women’s version, the Bahama Mama Surfsuit while they’re on sale today only!
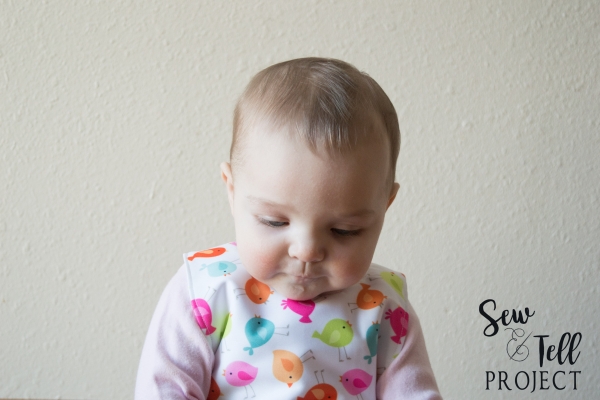
The Houdini Bib has two versions: a basic bib with just the strap around the neck, and the Houdini version which has straps that criss cross in the back and snap below the arms. It is also available in three sizes: baby, toddler, and preschooler. After I made these, an inch was added to the length of the Houdini straps to provide a bit more room for movement.
The criss cross straps prevent Miss M from grabbing the bottom of her bib and shoving it in her mouth. There also is an optional pocket to catch food and crumbs while your little one is eating. I added the pocket to my white bib, but it’s a bit hard to see in the pics.
The options of fabric you can use to make the Houdini bib are endless. I made mine from PUL from Joann Fabrics. Amy offers some adorable PUL in the Peek a Boo Fabric Shop too! Other testers used flannel or terry as well. I’m planning to make a few from flannel with a PUL back to catch all the drool from my teething baby. Hop on over to Peek a Boo Pattern Shop and grab your copy of the Houdini Bib while it’s on sale today only! It’s a perfect stocking stuffer for the little ones in your life.
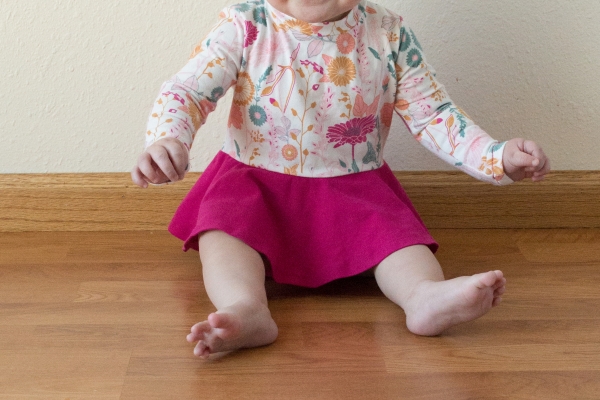
For this mash up, you need all the Gloria pattern pieces for the play dress, as well as the front, back, and leg bands of the EMMM. Take the bodice piece of the Gloria along with the front of the EMMM. Line the pattern pieces up at the armscye and draw a dotted line across the bottom of the Gloria piece.
Since you will be using the bottom of the EMMM piece, you need to account for seam allowance. Since the Gloria has a 1/2″ seam allowance, I then drew a line 1/2″ closer to the top of the EMMM as shown in this picture. Your pattern pieces are different widths, but the EMMM and Gloria have different seam allowances. I promise it will work in the end!
The solid line is where you will cut your bottom piece of the onesie. I just fold the part of the pattern I don’t need out of the way while cutting. Repeat these steps for the back as well. When you are finished cutting, you will have these pieces from the EMMM: the bottom front, bottom back, and leg bands.
From the Gloria, you will have the following pieces: bodice front, back, sleeves, neckband, and skirt (either gathered or circle).
At this point, you will assemble each part. I first assembled the EMMM bottom making sure to use the 1/4″ seam allowance as noted in that pattern. Then assemble the top of the Gloria using the 1/2″ seam allowance noted in that pattern.
Finally pin your skirt to your bodice. Then turn the onesie bottom inside out, and slip it over the bodice/skirt. Make sure you align the back of the onesie to the back of the bodice. Trust me, I had to seam rip my first one because I assembled it backwards.
Sew these together using a 1/2″ seam allowance. Flip everything right side out. Add snaps to your onesie, hem the sleeves and skirt, and you’re done!
I found this mash up also works well paired with the Lollipop Leggings to keep those chubby thighs warm 🙂
For one final pic, I’m sharing my daughter’s Wonder Woman costume which I made using this same combination (as well as red and royal blue solid cotton/lycra from PAB).
