Hyde Park Hoodie with Shawl Collar tutorial…..

The Peek-a-Boo Pattern Shop released the Hyde Park Hoodie recently (9/10/15) (affiliate link). I am reposting this tutorial on 10/1/2015 since for some reason it does not appear on the homepage of the blog. The tutorial will still remain up in the tutorials section.

In my years of sewing patterns created by independent designers, I have never seen such anticipation of a pattern release! I was lucky enough to be chosen to test the pattern and I can honestly say it is my favorite thing I have ever made for myself.
I decided to use some red fleece from my stash, gray knit for the lining, and some gorgeous Monaluna Folk Flowers for my hood accent. The only mods I made to my first sew were adding 2″ of length to the pattern since I am 5’10”.


When it comes to Amy’s patterns, I have a hard time sewing just one. This pattern was no exception, and I headed to the fabric store the day after I finished my red vest.
Since I purchased a bit of extra yardage of this double layer quilted knit by Doodles, I decided to play around with my pattern pieces to make a collared version of the hoodie.

I followed the pattern (with 2″ length added like my red vest) and tutorial as written. The only update I made was to the hood pattern piece!
Would you like to make a Hyde Park with a shawl collar, too? (I have not used this method on any other patterns, but I believe it would work on many hooded options!)
You will need:
The Hyde Park Hoodie pattern by Peek-a-boo Pattern Shop
A ruler
An existing shawl collar if you have one you like. You can measure how deep your collar is and add seam allowance and use that as a starting point on your pattern piece.
Fabric : In my blue jacket, I used my outer fabric for both the main and the lining of my collar piece. Remember thickness and texture of your fabric will change the drape and you may want to adjust your pattern pieces if you are going for a specific look. In the gray jacket used in the tutorial, I used a drapey rib knit for the collar, and sweatshirt fleece in the body.
*Please note: my instructions are for merely assembling the collar. I attached my collar to my jacket before sewing in the lining to make sure I like the fit. I recommend basting your collar on after you have sewn on the zipper guard to make sure you like the fit. You then remove the collar, and reattach it as you would the hood in the Hyde Park Hoodie Pattern tutorial.*
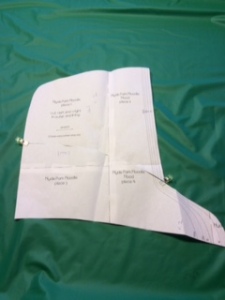
- Take your hood piece. For the blue jacket. I drew a line from where the Wonder Clip is in the right side of the pattern piece to where the Wonder Clip meets the left side of the pattern piece.
 2. Your pattern piece will now resemble something like below. From the bottom left corner to the top left corner, my pattern piece (for the blue tester jacket) measured 6.25″. I gradually drew the line to meet the curve that already existed in the Hyde Park Hoodie pattern piece (size L). For my grey jacket, I wanted a deeper, drapier shawl collar, so I extended my pattern piece an inch along the curve. You may need to change the depth of your pattern piece based on your preferences and size sewn.


3. (not pictured) Cut out 2 left and 2 right pieces of your collar. For my grey jacket, I am using a drapey rib knit fabric. I selected this because it has thickness to make the collar have substance, but will also stretch nicely (my sweatshirt fleece has no stretch). I chose to cut all my fabric pieces the same as the shawl collar will have a natural roll and the underside may show.
4. Take 1 left and 1 right piece and sew RIGHT SIDES together along the short straight edge of the collar. I used a half inch seam allowance. You may trim if it is bulky. Repeat for other pair.

5. Match two collar pieces RIGHT SIDES together and sew along the curve using a stretch stitch. I pin my seams open before sewing along the curve. I used a 1/2″ seam allowance. I trim 1/4″ off after sewing. My seam was wavy so I ironed it smooth again.

 6. Turn it so RS is facing out. I used my fingers to make sure I had the edges nice and smooth. I then toptstitched 1/4″ in from the curved edge.
7. Mark the center back of your jacket/vest.

8. Now you are going to baste your collar on to make sure you like the fit before you line your jacket. You could do it later, but I prefer to do it here while everything is unlined in case I want to change anything else.
9. I am very happy with the extra inch I added to my pattern piece for this particular sew.  However, when I left my sewing lair, I discovered that my fabric choices do not match as well as they did under my fluorescent lighting. I am on the fence about whether or not I will continue with this collar or select something else from my stash.

 In the meantime, enjoy my first ever tutorial! Check back later for my finished jacket. Questions? Leave me a comment.
(*Picture of my modified Hyde Park Pattern piece posted with permission from its creator, Amy Hindman).

Related Posts

Introducing the Chloe: A FREE Skirt Pattern from Made for Mermaids!
I don’t know about YOUR facebook feed, but lately my Facebook newsfeed has…

Another Dolman Day
So last week, I was finally able to share pictures of my Sun Kissed Tee…
Leave A Comment